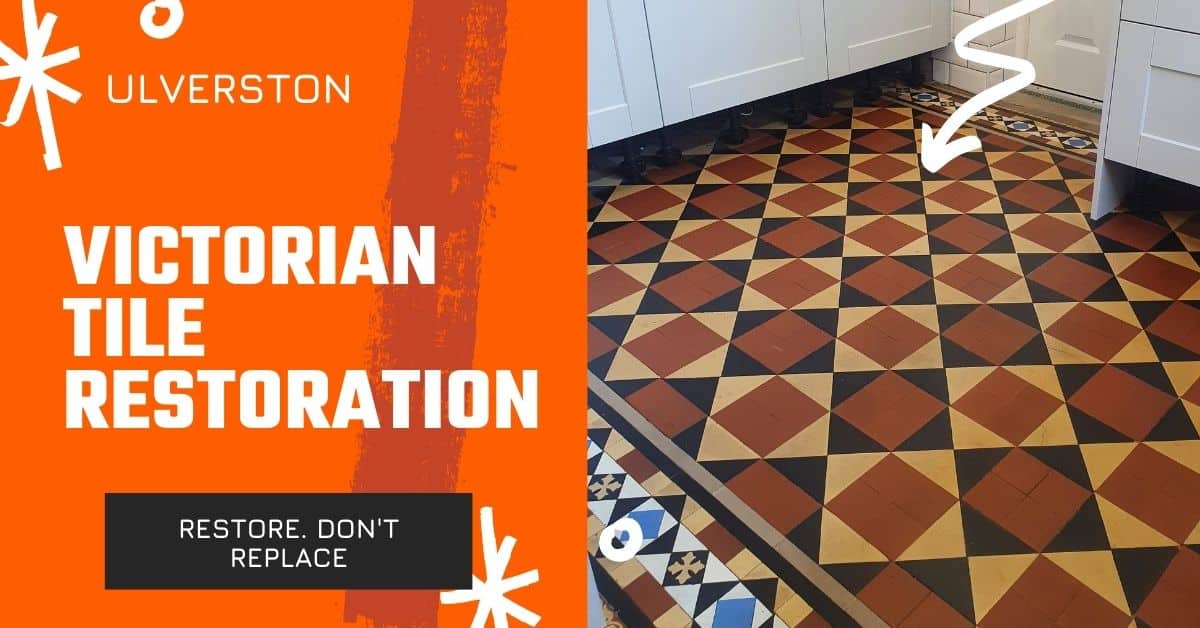
Original Victorian Tile Floor Restoration in Barrow-In-Furness
The homeowner contacted me to see if I could restore the original Victorian tile floor in their new home. They discovered it under some wooden flooring. Most of it was in pretty good condition, except the vestibule area. This was covered in a combination of old floor adhesives and some sort of bitumen. It was so bad you couldn’t even see the tiles. It was explained to the client that results in this area would be unknown. So I did price this part separately. The client wished to proceed as they didn’t want to cover it up if possible. I also discovered another company had quoted for the job. However, they insisted that they needed to buy a diamond pad to help with the job. This pad would cost £1k. I’ve been in the industry for more than 5 years and have relationships with many suppliers. This magical pad doesn’t exist. Perhaps the other company didn’t want the challenge of this project.
Removing The Adhesives From The Tiles
Removal of the old coatings could be achieved with a mixture of chemicals and mechanical processes. A fairly toxic chemical had to be used to do most of the grunt work. In this situation it was unavoidable. I implemented the correct PPE and nobody was allowed in the property while the chemical was used. The chemical is water washable so once it was removed from the floor the area was ventilated with fresh air. I also used a grit brush on my slow speed rotary machine. This 40g brush was enough to agitate the coatings of the tiles. The process was repeated several times until a suitable result was achieved. As you can see from the photo below, the result was quite impressive. Tile restoration projects such as these are great because they provide a challenge.
Cleaning The Victorian Tiles
After all of the old adhesives etc were removed it was time for a deep clean. This is achieved with a high alkaline cleaner. This product emulsifies any dirt, old waxes and kills old water-based sealants. I also like to use honing powders to aid in the cleaning. The tile floor was rinsed thoroughly to remove any cleaning residues. Residues can slow down the drying process. I flip between using another grit brush on the slow speed rotary.
At this stage, it is vital to leave the tiles and subfloor to dry out as fully as possible. Sealing is down with an impregnating sealant and you want the sealant to be where the water is after cleaning. Which is the pores or capillaries of the stone. If the tiles are not dry enough then the floor won’t be sealed correctly. On Victorian floors, the drying out stage can take 24 hours up to 2 months. It really depends on the previous damp issues in properties and importantly if the tiles have been covered with non-breathable floor coverings. This includes old vinyl flooring, Karndean, thick carpets and laminate flooring. More on this type of issue in future blog posts. Now on to the final results.
Sealing The Victorian Tiles
Sealing the tiles is the last, but vital stage. I don’t like to use surface coatings as it affects the breathability of the floor. Instead, I use Dry-Treat, usually Dry-Treat Colour Intensifier. This impregnating sealer forms a semi-permanent bond inside the tiles. Applied correctly it should last around 20 years. It also makes the colours on the floor richer which really helps to pop the whites and create a dramatic entrance in your home. Let us take another look at that final result from the perspective of the livingroom.